

If you’re still in the research stage or ready to sign up right now there are a few things you’ll want to get together so you can be as efficient as possible during the setup process. When you create your account, Klaviyo has a super useful Setup Wizard that will get your store linked, branding in place, and social channels linked so that way you’ll be ready to start sending from the jump. Below is a checklist of things you should get together before you start to be the most efficient and start your Klaviyo account on the right foot.
However, with that said, You can jump right into the account straight away with minimal setup. The Klaviyo Setup Wizard can be located in the account dropdown menu so you can run through it at a later time.
Items To Collect For Setup
- Store URL **Include the “https://“
- Commerce platform type (Shopify, Woocommerce, Magento, etc.)
- Store Credentials (API Keys, logins, consumer keys, etc.)
- Email from details
- Company Address
- Logo (png recommended)
- Your Color Palette (hex color codes) and Standard font
- Social Links (Facebook, Youtube, etc.)
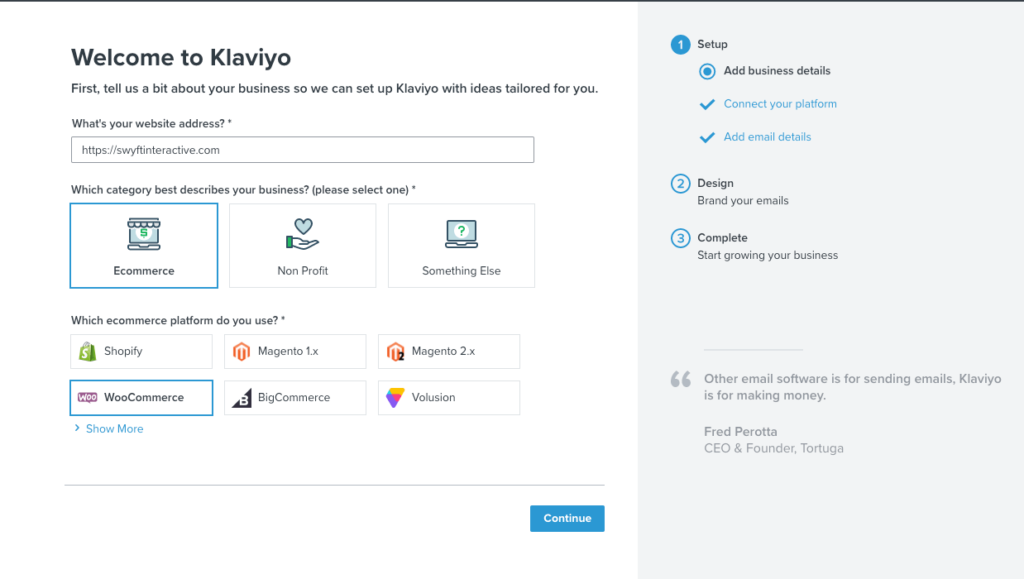
Hooking up your store
The first part of the klaviyo setup wizard initiates the connection between your store and the klaviyo platform. This first step, it will ask you which e-commerce platform you are using. Being that we develop mostly with Woocommerce and Shopify all of our examples will walk through setting up stores on these platforms. It is worth noting though that Klaviyo integrates with a bunch (Magento, Bigcommerce, 3dcart, etc.) and this connection can be made at a later date.
If you are hooking Klaviyo up to your Shopify store then you will need your Shopify Domain, eg. Mystore.shopify.com. Klaviyo will then ask for you to log in to make the connection.
For Woocommerce you will need to login to the admin panel of your store and complete 2 actions first.
The first action to complete is to login to your WordPress dashboard, navigate to WooCommerce > Settings > Advanced > “Legacy API”. Check the box for “Enable the legacy REST API” and click save changes.
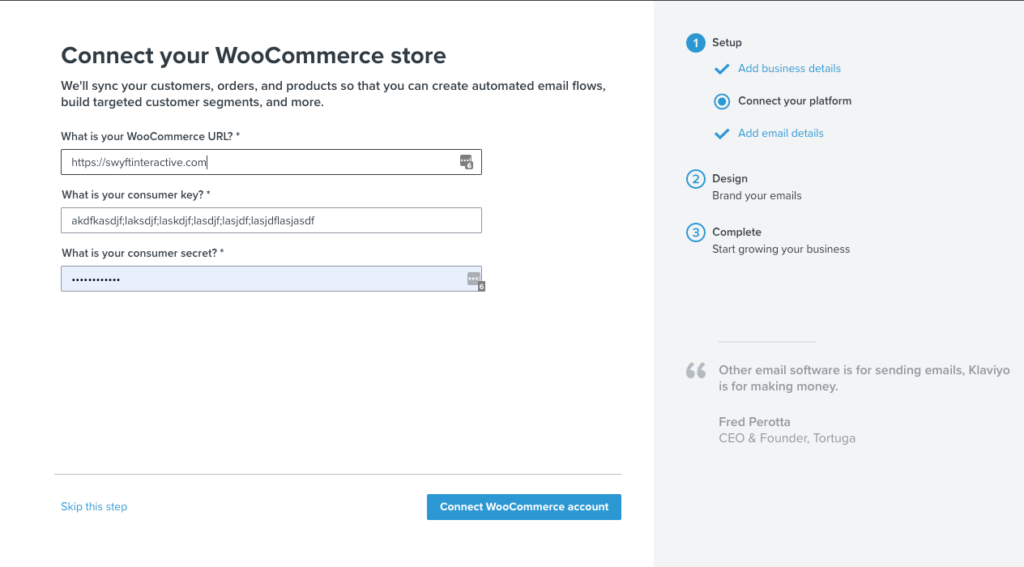
Second, Navigate to Woocommerce > Settings > Advanced > “REST API” option that should be one menu item over from the Legacy API link. It is here that you will click “Add Key” and name your key “Klaviyo Connection”, select the user assigned to the key (an admin user is fine) and ensure that you set the Permissions to the “Read/Write” selection in the dropdown menu. Then click the “Generate API Key” button. When the screen reloads you will want to copy the Consumer Key and Consumer Secret for copy into the proper fields.
In the Klaviyo setup wizard, you will enter your Store URL (https://yourstore.com), the Consumer Key and Consumer Secret. Once entered and you click the “Continue” button Klaviyo will start the syncing process with your store. This may take some time depending on your total number sales records and products but essentially Klaviyo is now syncing all the data you need to be more effective in your segmentation and automations.
4 Important Notes
- With Shopify, syncing in Klaviyo happens in real-time. Meaning a customer makes a purchase, at that moment the purchase is also recorded in Klaviyo
- Woocommerce syncing happens every 60 minutes. Meaning a customer makes a purchase, that purchase is recorded in Klaviyo sometime within the next 60 minutes depending on where Klaviyo is in the cycle.
- To finish the connection with Klaviyo, you will need to install the Klaviyo plugin in WordPress. A small setup is required for this but we will go through it later. for now, this setup will get data flowing into Klaviyo and get you everything you need to get started down the right path.
- Connecting your store populates the “Dimensions” in your account that you will use to narrow in on actions your customers have completed. These are different based on your integration.
(Click to Enlarge, Scroll for More Details)
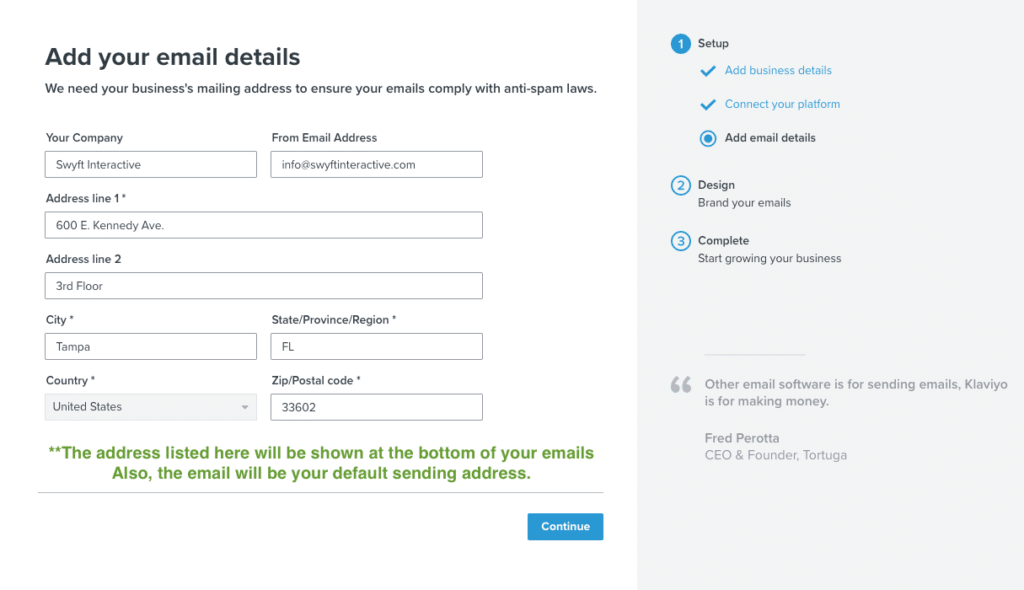
Email and Company Details
Not a lot of explanation is needed here. The company address is…. well… the company address. The one thing of important note here is that the From Name and Email here is what Klaviyo will pre-populate in your automation and email templates as the from information. So make sure to put the right stuff here. Even though we experiment with these from a strategy perspective later it’s best to put in the professional name and email here just in case you get an errant send.
Logo Files
The Klaviyo Account Setup Wizard will scrub your site for your logo but it will pick up any random image that’s on the home page or URL that you specify. So it’s highly suggested that you have a horizontally oriented PNG version of your logo on hand no wider than 650px. Typically a good logo size falls in the range of 250x100px but this absolutely is dictated by your logo.
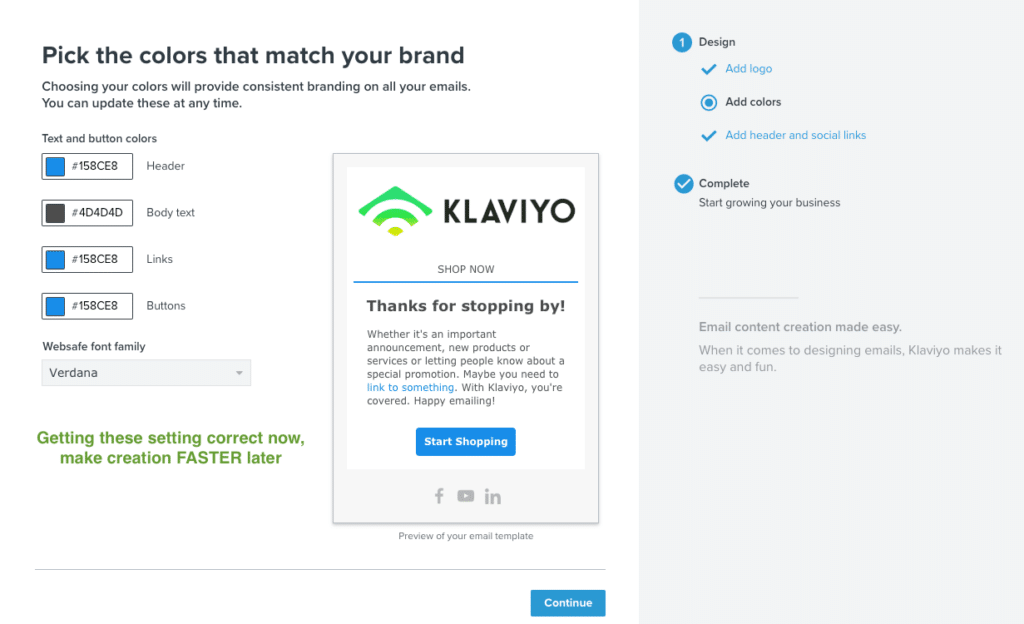
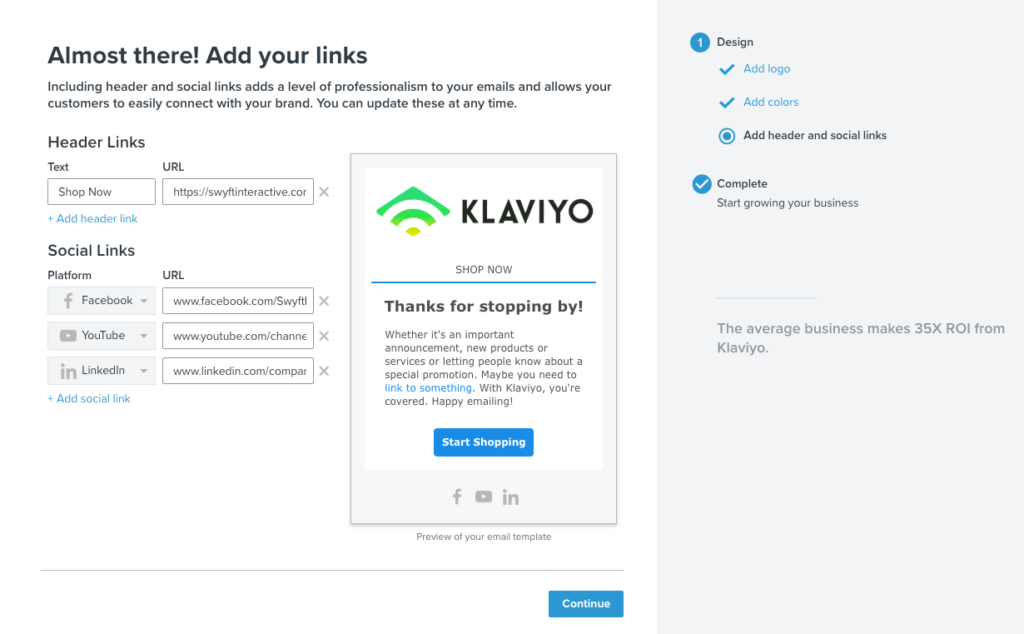
Color Palette and Social Links
Again, here you are going to be setting these fields up to be your “Defaults”. So as you go through the wizard it will be super useful to have these on hand. You’ll be able to setup text, headline, and link color as well as specify your default font. Once done, you’ll see these colors used when you go to create new email templates or add existing templates to your automations.
Same for your social links. We HIGHLY suggest you set these up here and not skip this step. Making sure these are correct here will pay dividends later and you’ll have one less thing to check before you send any campaigns. Nothing sucks worse than sending an email and having someone try to click through to your social channels only to get a broken link.
A third option you’ll have on this social links page is to enter any important menu links like a “Shop” link or something else. If you have something that you think is important you can certainly add it here but at Swyft we are not big fans of navigation menus at the top of your emails. To us, it defeats the purpose a little bit of what your messaging and content should be, however, we recognize that sometimes you’ll want to at least give someone the option to see a different part of your store. So if you have something like that, enter it here and we can always turn it off in the email editor later.
Start Creating Your Emails!
Quick and easy if you have all your content right off the bat. Going through the Setup Wizard will streamline your email creation process and allow you to get things done faster. If things change in your business or you want to make changes to your defaults you can do that by either making the changes in your account area or re-running the Setup Wizard from your settings menu at any time.
Up next we’ll get into understanding the Dimensions of your Klaviyo Account.
Till next time,
Leon